今天在调研一个Electron项目时,依赖安装到Electron突然报错:
HTTPError: Response code 404 (Not Found) at Request._onResponseBase (*\package\node_modules\got\dist\source\core\index.js:913:31) at Request._onResponse (*\package\node_modules\got\dist\source\core\index.js:948:24) at ClientRequest.<anonymous> (*\package\node_modules\got\dist\source\core\index.js:962:23)查搜索引擎猜测这可能是npm registry设置成淘宝源导致的,于是我去查了查registry:
npm config get registryhttps://registry.npmjs.org/这就很奇怪了,我的registry是npm官方源没错,但却出现了设置成第三方源出现的问题。
于是我就跑到electron安装所依赖的’@electron/get’包中找url的拼法,插了一堆console.log()查到ELECTRON_MIRRROR变量是https://registry.npmmirror.com/mirrors/electron:
(在写这篇博文的过程中我才意识到:Electron的资源并不是到npm registry上拉的,这里拉的资源是electron GitHub仓库Release中每次构建出来的artifact,Electron以该artifact为基底结合main和renderer代码生成最终的包)
注意,ELECTRON_MIRROR不等同于npm registry!!
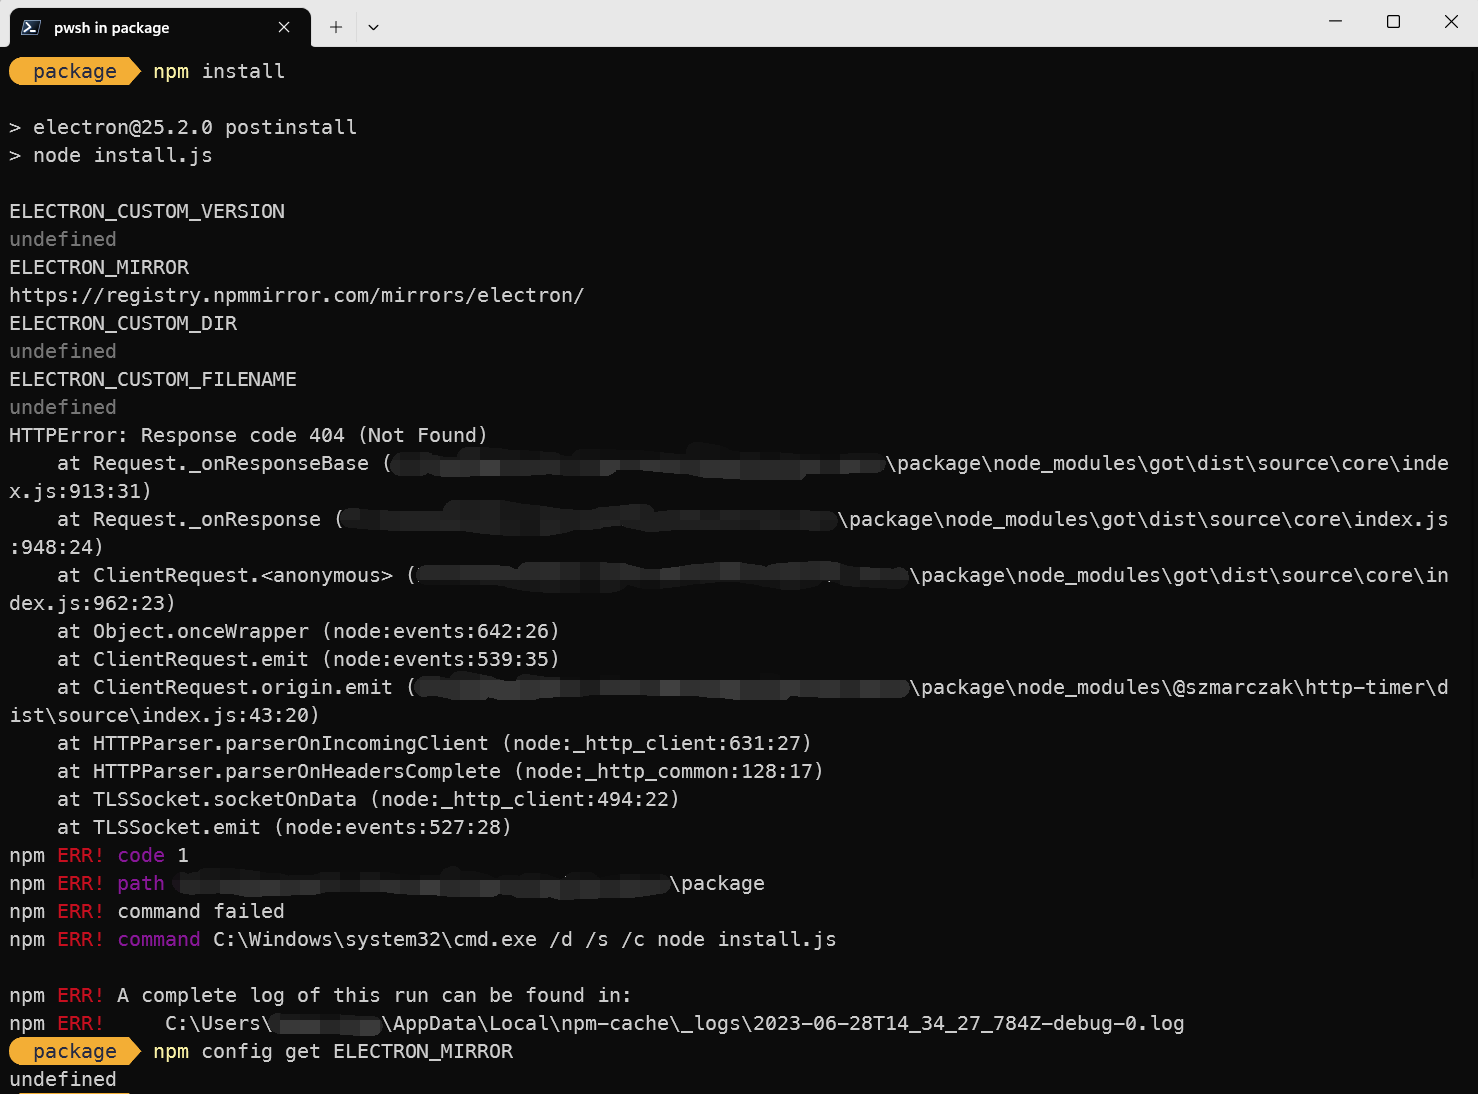
但是ELECTRON_MIRROR参数在npm中是undefined,那么问题出在哪里呢?
根据这篇文章:https://newsn.net/say/electron-mirror.html
对于win系统,可以修改全局变量,很简单。新建用户全局变量即可。如下图所示:
名称为ELECTRON_MIRROR,值为:http://npm.taobao.org/mirrors/electron/ 。
一查系统的用户全局变量,果真如此:
解决方案:
如果您在之前已经设置了系统的环境变量,需要继续使用淘宝源的,把ELECTRON_MIRROR设置为:
https://npmmirror.com/mirrors/electron/
即可,如果您不需要使用淘宝源,则直接删除ELECTRON_MIRROR,让其fallback到GitHub下载。
当然,也可以在npm中设置ELECTRON_MIRROR:npm config set ELECTRON_MIRROR https://npmmirror.com/mirrors/electron/
我的建议是在npm中设置,因为每次下载Electron依赖这个行为在npm中发生,后续出现问题也可以很快的在npm范围内定位。
当然,我是不会忘记系统变量里还有ELECTRON_MIRROR这一茬了啦(苦笑)